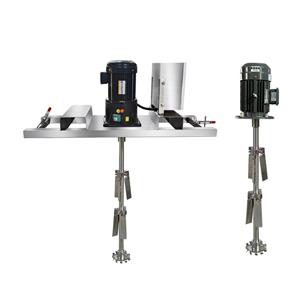
Customized advantages of grinding machines and their maintenance
The restaurant uses a colloid mill to grind the broth. You can chop the chicken bones with meat, mutton into pieces or use a meat grinder to break it, and then boil it with the ingredients until soft and rotten, and put the boiled broth into the colloid mill equipment Circulate and grind it several times, and the mutton soup will gradually become thick and smooth. Put the ground mutton soup into the boiler and boil until it boils, and then add some other seasonings. A delicious soup is ready for me. Up.
The small colloid mill is an electric machine used to grind particles. Generally, it has a funnel-shaped entrance. The middle is the main machine (grinding disc) and the bottom is the exit. The distance between the grinding discs can be adjusted to control the size of the material to be ground. The basic principle of the colloid mill is that the fluid or semi-fluid material is connected between the fixed tooth and the movable tooth, which rotates at a high speed, so that the material is finely pulverized by strong shearing.
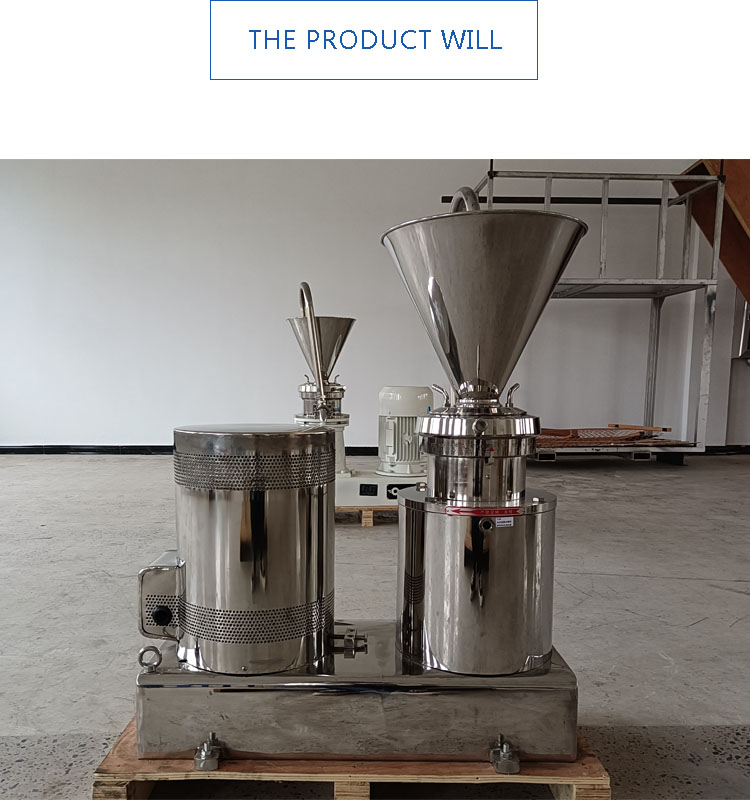
The advantages of colloid mill, compared with pressure homogenizer, colloid mill is a centrifugal equipment first, its advantages are simple structure, easy maintenance of equipment, suitable for materials with higher viscosity and larger particles. Its main disadvantage is also determined by its structure. Due to the centrifugal movement, the flow rate is not constant, and the flow rate varies greatly for materials with different viscosities. For example, the same equipment, when processing viscous paint materials and thin milk fluids, the flow rate can differ by more than 10 times; secondly, due to the high-speed friction between the stator and the material, it is easy to generate greater heat. Denature the processed material; third, the surface is easier to wear, and after wear, the refining effect will be significantly reduced.
The colloid mill is composed of stainless steel and semi-stainless steel colloid mills. The basic principle is to pass between the fixed teeth and the movable teeth that are relatively linked at high speed. In addition to the motor and some parts of the colloid mill, all the parts in contact with the material are made of stainless steel. In particular, the dynamic and static grinding discs are strengthened. Therefore, they have good corrosion resistance and wear resistance. The materials produced are pollution-free, sanitary and pure.
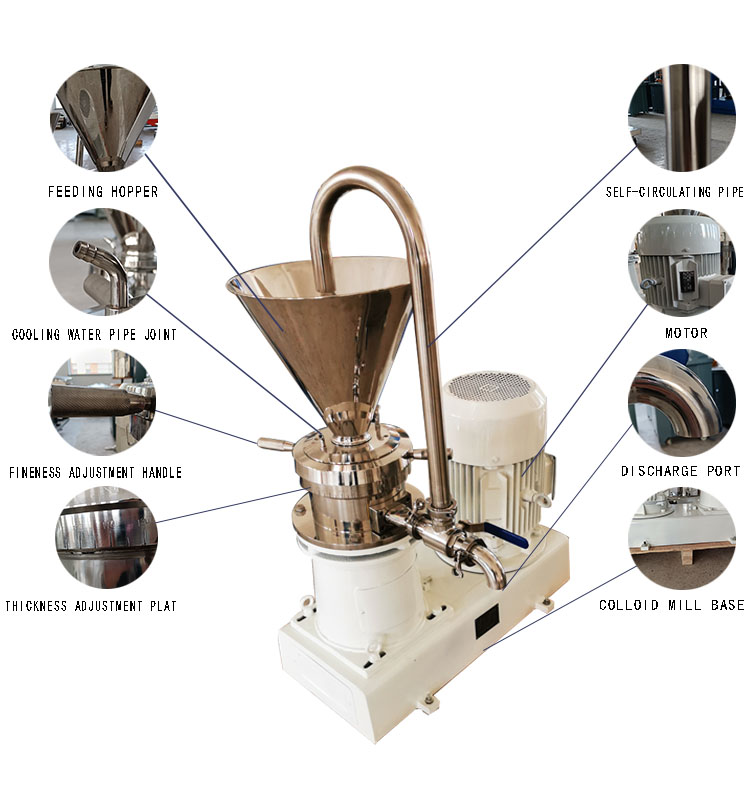
Grinding machine/colloid mill installation: 1. The equipment is installed horizontally on a flat concrete foundation and fixed with anchor bolts (it may not be fixed according to working conditions). 2. Check whether the fastening screws are tightened (the rotor center screw is an M12 left-hand screw). 3. Before use, use a special wrench to turn the rotor to check whether it is in contact with the stator and whether there is any jamming. If the above conditions are not allowed to start. 4. Check and connect the power cord (three-phase alternating current, voltage is 380 volts, body protection is grounded) and pay attention to the rotor rotation direction should be consistent with the arrow on the base (clockwise rotation). 5. Connect the cooling water, and pay attention to the water inlet and outlet signs of the water nozzle. 6. When starting the motor, first click the switch to check whether there is noise or vibration. If the situation is abnormal, shut down immediately and try operation again after troubleshooting.
Colloidal grinding and rotor gap adjustment method (adjustment should be carried out under the running state): loosen the two handles b, move the handle to drive the large chuck to rotate, adjust the gap, rotate the positioning plate clockwise, the gap is reduced, and the material particle size becomes finer . The counterclockwise rotation increases the gap, and the material particle size is coarse. After adjusting the gap between the stator and rotor, both handles should be tightened at the same time (clockwise). According to the particle size and batch requirements of the production materials, the limit screw can be adjusted to achieve the limit purpose after selecting the better stator and rotor gap.
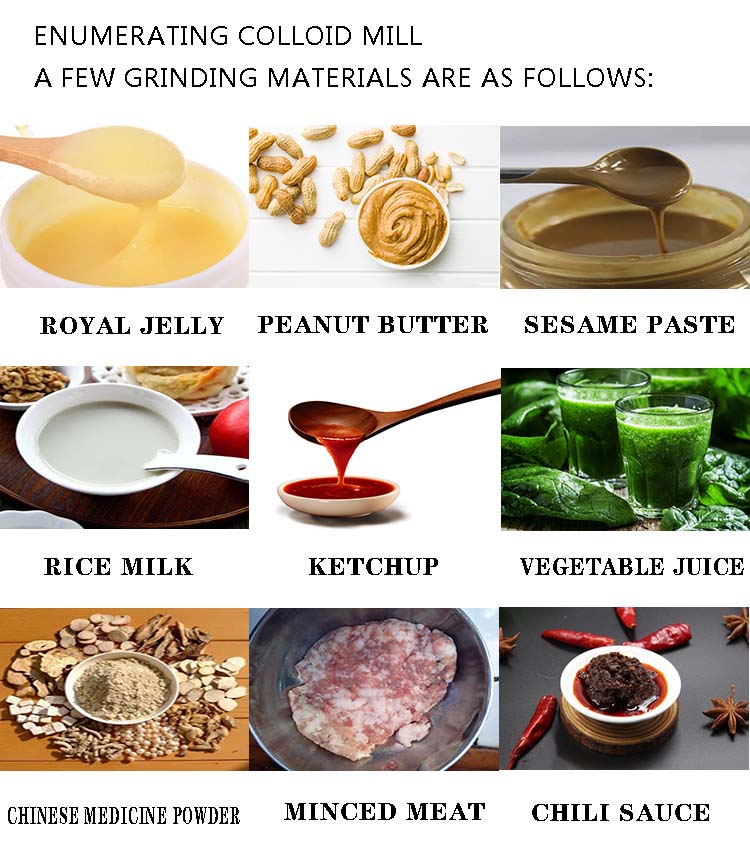
Colloid mill application range Food industry: aloe, pineapple, sesame, fruit tea, ice cream, moon cake filling, cream, jam, juice, soybean, soy sauce, bean paste, peanut milk, protein milk, soy milk, dairy products, malted milk extract, flavor , Various beverages, etc.
The size of the colloidal grinding mill model determines the output that it can provide
The flow rate of the colloid grinding mill is constant, and the flow rate of materials with different concentrations and viscosities varies greatly. For example, the same equipment, when processing viscous paint materials and thin milk fluids, the flow rate is very different.
The output size is determined by the concentration and viscosity of the material.
The main components of the colloidal rubber grinding machine are composed of three parts: the grinding core part, the base transmission part, and the special motor. The dynamic and static grinding cores of the grinding core are the key parts of the machine. Therefore, the selection is based on the nature of the material to be processed. It will be different too.
According to the material processing requirements, the colloid mill can be ground one or more times. Several experiments should be done before grinding to ensure a better gap and flow rate. Always pay attention to the grinding work and running time before use. If there is any abnormality, it should be shut down immediately and disassembled for inspection.
Steps to replace the fixed gear of the colloid mill
The first step: Loosen the handle of the colloid mill, and then turn it counterclockwise. After it is in a slippery state, it starts to swing slightly from side to side and slowly lift it up.
Step 2: (Replace the rotating gear) Move the fixed gear plate, and after seeing the rotating gear on the base, first loosen the blade on the rotating gear, use a tool to lift the rotating gear up, and replace it with a new one , And then screw the blade back in again.
Step 3: (Replace the fixed teeth) Unscrew the screws on the fixed gear plate. At this time, pay attention to the small steel balls on the back; after disassembly, the fixed screws are unscrewed one after another, and then take out and replace with new fixed teeth. Reinstall the disassembly steps.
Step 4: (Install the fixed gear) The installation steps are opposite to the removal steps, and the methods are the same, and the installation can be completed by analogy.
